
Today I finally have a savoury recipe for you all! It’s usually difficult providing a savoury recipe as I’m always doing things by eye. Thankfully this Focaccia recipe is the exception because I have to actually measure things out in order to have this bread turn out perfect each time. My recipe for Focaccia is the best because it is actually easy to make, requires only a few ingredients, many of which you may already have at home, and the results are delicious! If you are not sure what Focaccia is, it is essentially a soft, dimpled, oven-baked Italian bread, that is similar to a pizza dough as well. I bake this just until it is golden brown on top, so that it is slightly crisp on the outside, yet soft and delicate on the inside. In this recipe you can of course leave it plain with just a sprinkling of salt (that would make this an easy 6 ingredient recipe). I however usually like this topped with things like onions, potatoes, olives, the list goes on. I share my favourite way to eat this – topped with cherry tomatoes baked right in, sprinkled with salt, and just a tiny bit of Italian seasonings (think rosemary, basil, oregano, etc…) The results are an addictive bread that can literally be eaten as it, almost like a pizza, or even as the ultimate bread for a sandwich. However you make or eat this, the results are truly one of the best bread experiences you will have. Do not be intimidated by the rise times, or using active dry yeast, because it really couldn’t be easier. I even show you how I make this in my latest YouTube video tutorial, so be sure to check that out HERE, for some great visuals! Without further ado, here is the recipe:
Focaccia Dough Ingredients:
2 Cups Warm Water
2 1/4 Tsp Active Dry Yeast
1 Tbsp Sugar
–
4 Cups All Purpose Flour
1 Tbsp Salt
2 Tbsp Extra Virgin Olive Oil (+more for later stages…)
Focaccia Dough Instructions:
To start, combine the warm water (you can use hot tap water, or microwave the 2 cups for 15 to 20 seconds, you want this warm, not cool or piping hot), with the yeast, and the sugar, and give this a stir, then set this aside (I usually keep this in my microwave or a warm spot) for 10 minutes. This is the time this yeast needs to proof. After the 10 minutes this should be bubbly on top. If it looks like nothing happened you will need to start again as it may not have activated.
During the proofing time, I combine the flour with the salt, and give that a quick mix to incorporate in the stand mixer. I use my dough-hook attachment, as that is important for when making any bread like dough.
After the 10 minutes, once the yeasty water has proofed (bubbled, and even changed colour), add this to the flour and salt mix, and then add the olive oil.
I then turn on the mixer to the 3 speed (medium low) for about 4 to 5 minutes, and then to the 4 speed (medium) for another 4 to 5 minutes (8 to 10 minutes total kneading time). Be sure to keep your mixer in the centre of our workspace, as it can hop it’s way off the counter if you leave this unattended.
Once the dough is finished it will be a sticky dough, you will need a large, clean and oiled bowl (about another 1 Tbsp of the olive oil). Smear the oil around the bowl, and then carefully take your dough out of the mixing bowl, and place it into this oiled bowl. Then flip the dough over so that the top and bottom is coated with the oil.
I like to then microwave a cup or so of water, or pour boiling water into a cup, and let that steam up the microwave to create a warm environment for this dough. It is a little trick to having a nice warm environment for your dough to rise in.
Cover this oiled dough with plastic wrap, and also place a clean cloth over the bowl. This needs to rise in a warm spot (my microwave) for 1 hour and 30 minutes. This is the first rise (there will also be a short second rise later).
After the first rise we can begin to form the dough, and also place our optional ingredients on top, before letting this rise for a second time…
After the 1 hour and 30 minutes in a warm spot, you should essentially see your dough has doubled in size. Now we need to take a sheet pan with some kind of wall, mine has about an inch wall, but even a larger wall is good in this case, you just don’t want to use a completely flat pan.
Coat the pan with more olive oil (about another 1 Tbsp), and spread it around.
Then take your risen dough, and carefully pull it out of the bowl and onto this oiled pan. If you have nails like me, it will be difficult using your fingers to poke the dimples into the dough, so I use the pads of my fingers and knuckles to spread this dough around. If you do not have nails, you can use your finger tips to do as follows…
Spread the dough around the pan with your hands, while also dimpling the dough with your fingers or knuckles. This is a sticky dough, but your hands will be a little oiled from spreading the oil around the pan, which makes it easy to do. You can watch me do that HERE.
Once your dough has spread to the edge of the pan on every side, and it is nicely dimpled, you can then add a bit more olive oil on top (barely 1 Tbsp more), and work that in as well.
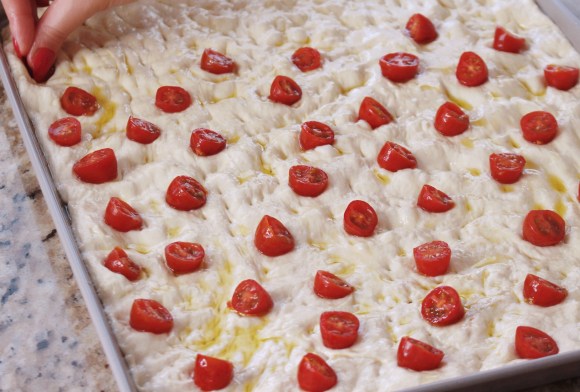
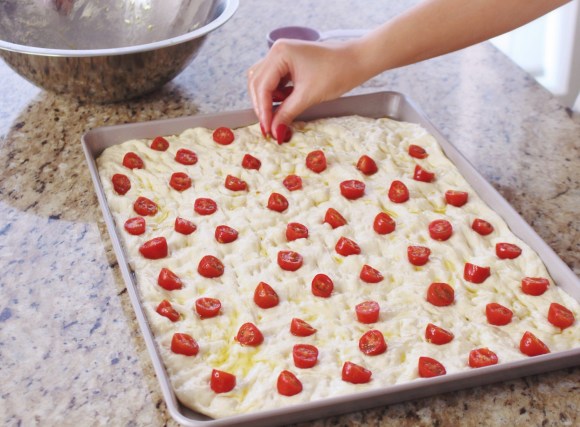
Then if you are not eating this plain, but would like to make it in my favourite way, take cherry (or grape) tomatoes, half them, and place them into the dough, half side up. You can use as many as you like (you can even do this step after the second and last rise, but I like to do it first so that right after the rise, all I do is sprinkle it with salt and pop it into a hot oven).
Next I also like to use a bit of Italian seasonings, just 1/4 Tsp for me is enough, I just like a light flavouring of this, and I sprinkle it over the top. This is optional.
I like to add my salt, right before it goes into the oven, so I don’t add the salt yet.
Now you can cover this dough with plastic wrap, and a cloth again, and place it into a warm spot (my microwave), for the second (and last) rise of only 45 minutes.
After the last rise, we can then bake this dough.. I like to pre-heat my oven to 400 degrees F at the 25 to 30 minute mark, so that my oven is ready and warm once my Focaccia has finished rising…
After the 45 minutes, once your Focaccia has risen, you will notice the dimples are still there, it will just look a bit more puffy. I now like to add the salt, about a 1/2 Tsp (I used fleur de sel, but you can use any salt you like).
You hopefully have your oven ready at 400F and now you are ready to bake the bread. I am a bit particular in baking this, so I like to first bake this for 25 minutes on the second to last bottom rack, and then after that baking time, I like to place it on the middle to top rack and bake it for another 4 to 5 minutes, this helps it become nicely golden brown on top, and still stay fluffy and soft on the inside. It is optional, and if you can’t be bothered about 28 to 30 minutes on the 2nd bottom rack is fine.
Another great tip is, if you would like the top more browned, during the last 2 or 3 minute of baking, put the broil option on your oven. The top will be nicely browned!

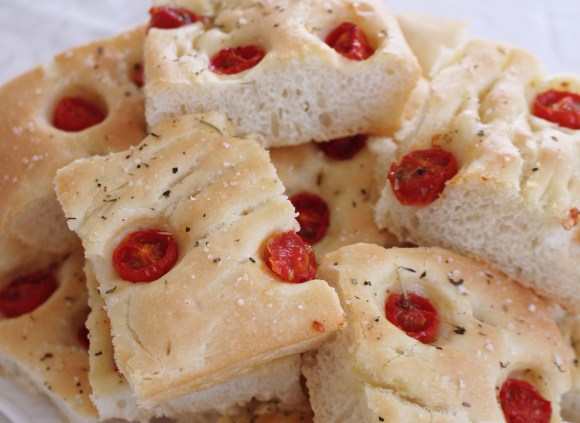
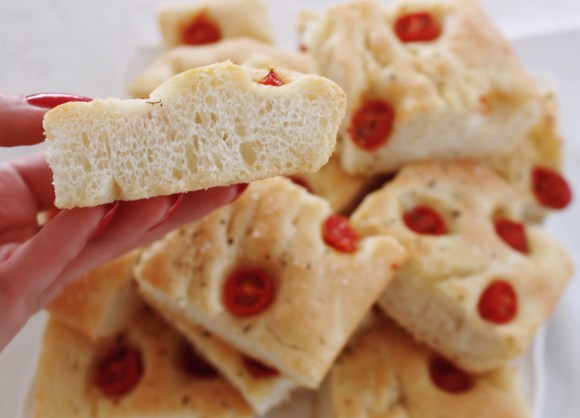
TA DA!! You now have a delicious soft, fluffy, yet slightly crisp Italian Focaccia bread ready to eat! I like to give this about 5 to 10 minutes to sit in the pan before cutting into it. The best way to cut into this Focaccia is to just use kitchen scissors – skip the knife! It is best eaten warm, but even cold or room temperature is delicious. You can eat this plain, almost like a pizza, or dip this bread into more olive oil, use it as bread for the ultimate sandwich, the choice is yours! Whatever is not eaten is best kept with a cloth over the top, so that it doesn’t dry out.
Thanks so much for reading this recipe, I really hope you give this a try, as I know you will love it, and once you make this once, and see how easy it is to make this beautiful Italian bread at home, you will likely want to make this again and again. It’s amazing how fun and rewarding it can be to make your own Focaccia at home! Of course everyone loves Focaccia because it is naturally vegan as well, so it is a real crowd pleaser! 🙂
Love: Lisa (@ladolcelisa)

One reply on “Focaccia | Easy Italian Bread Recipe”
[…] Focaccia | Easy Italian Bread Recipe […]