
I have been making this dessert for years, and every time I bring it over to an event I always get asked for the recipe. People are always so impressed by this pie, that they don’t believe me when I tell them how easy it is to make! I finally found Key Lime’s at my local grocery store, as now is the perfect season for them, so I decided to not only share the recipe with you all, but I also of course filmed it (HERE) for my YouTube channel, so that you can have a better visual guide as well. I break this recipe down into 3 easy steps, the creamy Key Lime filling, the graham cracker crust (studded with slivered almonds), and the whipped cream topping (which happens to be toasted coconut whipped cream). Every step comes together in just minutes, making this impressive dessert as easy as it is delicious! I find that this is honestly the best Key Lime Pie I’ve ever tried, not to sound bias here, but is is the perfect amount of creamy, tart, sweet, crunchy, basically everything you’d want in a dessert – specifically a summer time dessert as it is so refreshing! Do not be intimidated by this recipe, it could not be easier to make! So without further ado, here is the recipe:
Key Lime Filling Ingredients:
Approx. 2 Tsp of Key Lime zest (from approx. 5 Key Limes)
1/3 Cup of Key Lime juice (approx. 12 Key Limes)
4 Large Egg Yolks
1 Can Sweetened Condensed Milk (300ml)
Key Lime Filling Instructions:
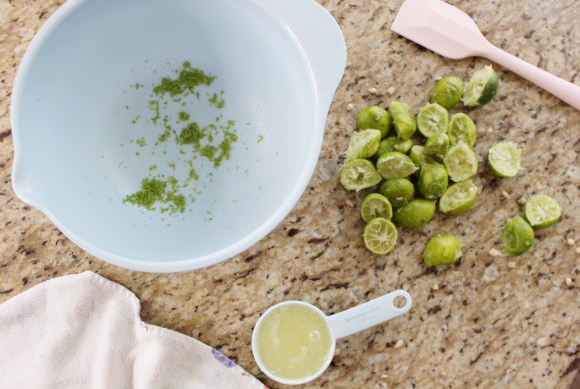
The first thing I do, which is why it is listed first in ingredients, is zest the Key Limes. I usually aim for 2 teaspoons of zest, which I find is approximately from 5 Key Limes. Zest the limes into a large bowl.
Next, juice the Key Limes to fill 1/3 of a cup full. I find this adds the perfect amount of tang to the pie, 1/4 of a cup is too little, and 1/2 a cup is not enough, so this tends to be the perfect amount. You will likely have to go through around 12 Key Limes give or take, as they are quite tiny. It is easiest with a tool like a citrus juicer, but if you do this by hand, you should always roll the limes on a flat surface to really get the juices flowing.. It is a good idea to then strain this juice as you add it to the large bowl that way you do not add any seeds to the mix. Key Limes tend to have more seeds than your average Persian lime. They are also more acidic, but so delicious. If you cannot find Key Limes and still want to give this recipe a try, you can use the exact same measurements, and it will still be just as delicious!
Then you will need 4 egg yolks from a large egg. I always crack these in a separate bowl before adding them to the large bowl with the juice and zest.
Lastly, add 1 can of sweetened condensed milk to the large bowl with all of the ingredients. This is the sugar element of the filling, as well as what makes this so creamy and delicious. Take a whisk, and mix everything to incorporate, for about 1 minute or so. Then set aside while making the next step. I like to make the filling first, because it is always a good idea to let the filling sit for 20 minutes or so, to thicken and take on the flavours of the Key Lime juice and zest.

Graham Cracker Crust Ingredients:
2 Cups Graham Cracker Crumbs
1/2 Cup Slivered Almonds (optional, but so delicious)
1/4 Cup Sugar
1/2 Tsp Cinnamon (also optional, but delicious)
1/2 Cup Unsalted Butter (melted)
Graham Cracker Crust Instructions:
At this point you will want to pre-heat your oven to 325 degrees F.
In a large bowl, add 2 cups of graham cracker crumbs.
Next, add 1/2 cup of slivered almonds. This step is optional, meaning if you aren’t a fan of almonds you can skip this, but honestly, it makes the crust so delicious, and works really well in this pie.
Then add 1/4 cup of sugar, I find this is just the right amount to slightly sweeten the crust, without going overboard.
This is optional, but it adds an extra feeling of warmth to this pie, add 1/2 tsp of ground cinnamon (if you are not a fan, you can skip this step).
Lastly add 1/2 cup of melted butter. It doesn’t matter if this butter is still warm from being heated. Usually I microwave the butter for 30 to 40 seconds.
Once you have everything in the bowl, give it a good mix to incorporate. It should look and feel like wet sand.
Assembling the Pie:
Now to assemble the pie crust, take a pie or tart pan (I like to use one with a removable bottom to easier cut the pie in the end), and dump out the Graham Cracker filling.
Next take a spatula, your hand, or the combination of the two, and press the filling into the pan, being sure to build a wall with the crumbs. This crust is easily pack-able and should stay together easily. Be sure to smooth an even layer on the bottom as well. This makes a little bit of a thicker crust, but this crust is my favourite part, and so delicious!
Once your crust has come together, you can bake the crust for 10 minutes at 325 degrees. It is a good idea to bake this on a baking tray as well, as sometimes the buttery crust can seep through the pan (if it has a removable bottom like mine).
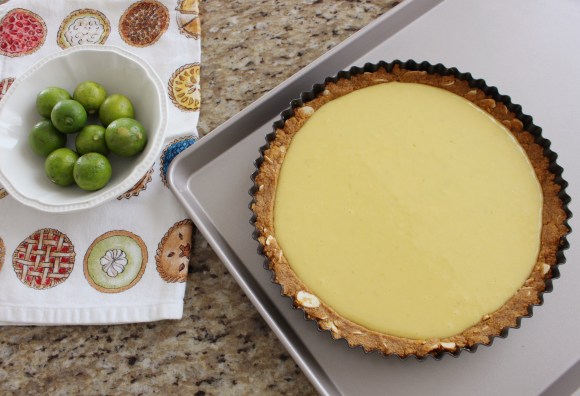
After the 10 minutes you are then ready to add the Key Lime filling we made earlier to the warm pie crust and bake everything for an additional 15 minutes in the oven at 325 degrees F.
After the 15 minutes, let the pie sit at room temperature for an additional 45 minutes before refrigerating for 3 hours, or overnight. I do not like to cover the pie with anything as you do not want to indent the delicate top of the pie.
After the 3 hours or overnight, you can then make the whipped cream! I like to make this last, right before decorating and serving.
Toasted Coconut Whipped Cream Ingredients:
2 Cups of Heavy (35%) Whipping Cream
1/2 Cup of Medium Shredded Coconut (toasted) *optional
1/4 Cup of Sugar
Toasted Coconut Whipped Cream Instructions:
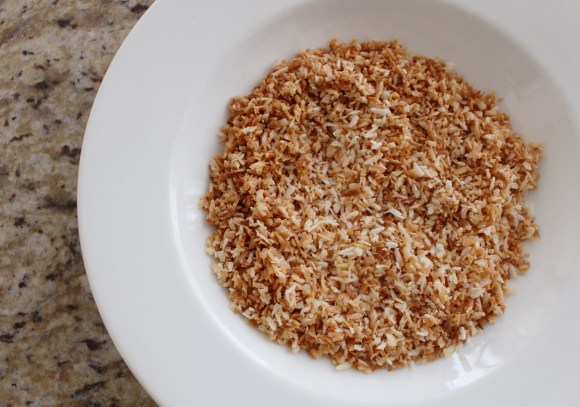
The first thing I like doing is toasting the shredded coconut. I like to use a medium dissection of coconut, as opposed to long shreds. I also like for this to be unsweetened coconut flakes, as I prefer to control how much sugar goes into my whipped cream, as I do not like it to be overly sweet.
In order to toast the coconut, measure out 1/2 cup and add that to a small pan. On a medium heat lightly stir the coconut and remove from heat until it starts to brown and look golden. It might take a minute or so to get started, but once it starts to brown, it’s only a matter of seconds… Once golden, remove from the heat, and transfer to a bowl to completely cool.
Next, we will need to whip the cream. You can do this by hand if you prefer, but I like to use a hand-held or stand electric mixer (to make my life easier).
Add the 2 cups of whipped cream, as well as the 1/4 cup of sugar to the mixer, and whip until fully whipped and fluffy. I like to over mix this a bit, as I find it is not runny on the pie, even the next day, and really holds it’s shape. The coconut also helps to keep the whipped cream fluffy, but if you hate coconut, you can add a vanilla bean instead.
When the coconut is fully cooled, add to the whipped cream, and whip to incorporate.
This whipped cream is lightly sweet, and lightly coconut flavoured. The toasting brings out the flavour, but not obnoxiously so. I love the texture the coconut adds to the whipped cream as well, and it compliments the Key Lime perfectly.
Assembling The Key Lime Pie:
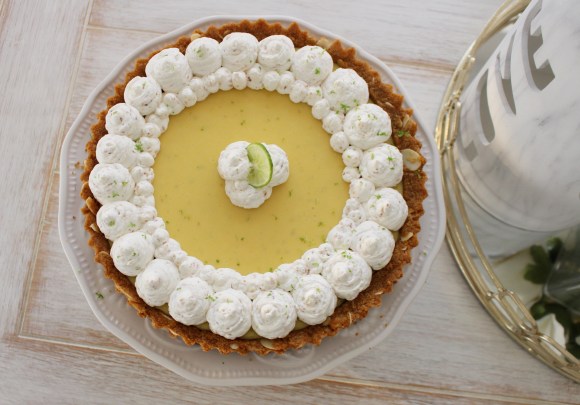
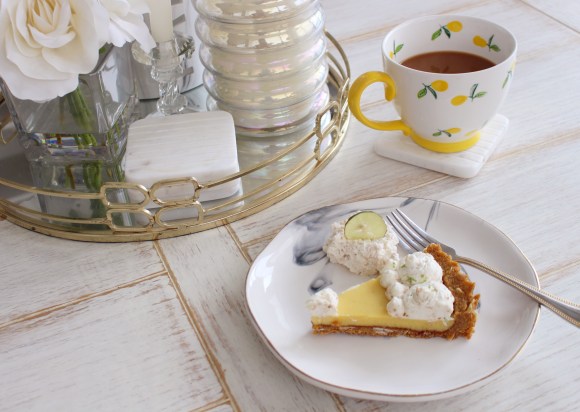
After the 3 hours, or overnight, we are now ready to pipe on this delicious toasted coconut whipped cream, and serve! I like to add the whipped cream to a piping bag, and pipe dollops along the edges of the pie. If you cannot be bothered you can also just spoon the whipped cream into the center of the pie and serve in that way. This whipped cream recipe makes enough for either way you decide to decorate. I also like to cut a sliver off of a Key Lime and add that to the center, as well as a little bit of additional Key Lime zest. You can watch me decorate and of course make the entire pie in THIS VIDEO.
Now we are ready to cut a slice and eat! This is of course my favourite part. A little tip is to keep this refrigerated until you are ready to eat. It is also good if left at room temperature for about 30 minutes, it tends to be even more creamy. However you slice it, this recipe is a winner! Once you taste this Key Lime Pie you will be shocked at how delicious yet easy this was to make. All of the flavours of this pie work very well together, and this is also such a perfect summer time dessert (the right season to find Key Lime’s as well).

I really love this recipe and it is one of my families favourite desserts, so I am so happy to share this with all of you. It is perfect to bring to any summer event! I hope you enjoy this recipe as much as I do, and I would really love to know what you think!
Don’t forget to watch me make this recipe HERE. Thanks for reading and watching 🙂 xo
– Lisa (@ladolcelisa)
