
Cannoli are easily one of the most iconic Italian desserts – and for good reason! Who doesn’t love the combination of that crisp, crunchy shell, paired with a deliciously creamy filling? Using my recipe I will show you how to make the shells from scratch, as well as how to make a Sicilian inspired cream filling for these lovely cannoli. Unlike most recipes that call for Ricotta cheese alone, I also use the addition of Mascarpone cheese to truly make these that much more delicious and creamy! Making this filing is so easy, you can even just prepare that alone and fill store bought shells if you’re in a pinch. I know these shells can be quite laborious, as we are making the dough from scratch, rolling it out, cutting it, and then frying… BUT, you will be really glad you did go the extra mile and make the cannoli shells from scratch. You will truly feel so accomplished and proud, and not only that, but I do have a few tricks to make this whole process a lot easier. With a few tools, such as stainless steel cannoli molds, as well as other optional kitchen tools to make the job a lot easier, (like a stand mixer, food processor, pasta machine, and kitchen thermometer), you will see that this recipe isn’t as intimidating as you might expect, and it is quite easy in fact. I will share my recipe and directions below, and hopefully it is clear enough to follow along to. I also have a video HERE where you can watch me in action, as I make this recipe for you on my YouTube channel. Without further ado, let’s start with the shells:
Cannoli Shell Dough:
Dry Ingredients:
1+3/4 Cups – All Purpose Flour
2 Tbsp – Icing Sugar
1 Tsp – Cocoa Powder
1/2 Tsp – Ground Cinnamon
1/2 Tsp – Instant Coffee Powder
1/2 Tsp – Salt
1/4 Tsp – Baking Soda
2 Tbsp Butter (room temp)
Wet Ingredients:
1 Egg + 1 Egg Yolk (*save the Egg White for later)
1/4 Cup – Marsala Wine (or any dessert wine)
1 Tbsp – White Vinegar (I used Apple Cider Vinegar)
To fry the dough you will also need frying oil – I used vegetable oil
– With the help of a food processor, making this dough comes together quite quickly and easily. If you don’t have a food processor, you can of course do this by hand, however, a food processor is what I used because it’s just so convenient and speedy – it basically does the work for you!
– In a small bowl, combine the ‘wet ingredients’ – eggs, marsala, and vinegar, set aside for now.
– In a food processor, combine all the ‘dry ingredients’ (except butter for now) – flour, icing sugar, cocoa, cinnamon, instant coffee, salt, baking soda, and pulse a few times to quickly combine (10 seconds or so).
– Once all the dry ingredients are combined, add the butter, and pulse a few seconds to combine as well.
– One combined, it is now time for the ‘wet ingredients’, add to the dry mix right in the food processor, and pulse until a dough forms. After 20 seconds or so, you will see the sandy mixture start to come together and turn into a lump of dough.
– Lightly flour a work surface and safely remove the dough, and place onto the floured surface. Then begin to work the dough with your hands for about 1 or 2 minutes. The food processor did most of the work here, we just want to fold and knead the dough a bit.
– Once the dough feels firm and less sticky, cover it with plastic wrap and refrigerate for 1 hour (or over night if you like).
– During this time, I like to clean up and then work on the Cannoli filling. Before I do, I quickly strain the ricotta, which is optional because the mascarpone will assure a thick and creamy filling (we don’t want a runny filling here). I do this to quickly remove any liquids, and usually about 1 or 2 tbsp of liquid quickly separates. That’s good, because I then add my own liquid in the form of an extract or alcohol later. This step is optional, but is good to do if you feel like your ricotta has a lot of moisture. Since the mascarpone is so thick, we don’t need to strain the ricotta for hours, just a few minutes will do the trick here.
Cannoli Cream (Filling):
500g – Mascarpone
500g – Ricotta
2 Cups – Icing Sugar
1 Tbsp – Rum Extract
Zest – of 1 small Lemon (can use half), grated
Pinch – Ground Cinnamon (approx 1/4 tsp)
Pinch – Salt
1/4 Cup – Mini Chocolate Chips
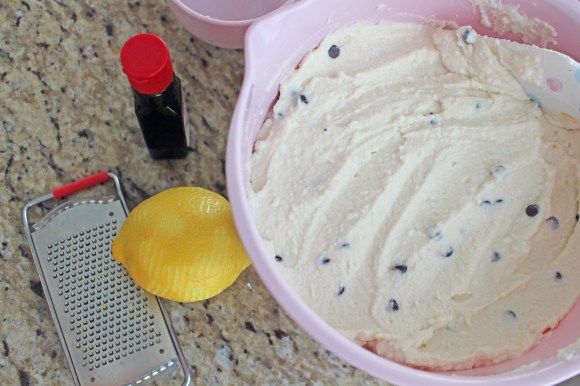
– Like I previously stated, this filling uses not only ricotta, but also mascarpone to make a truly delicious thick and creamy filling. The zests are optional, and you can even substitute lemon zest for orange zest for example, you can leave out the chocolate chips all together, or finely chop a bit of chocolate, as I’ve done before, you can substitute rum extract for vanilla, or any other alcohol really… etc.. The main ingredients are basically these cheeses, and sugar, but everything else is optional, or easy to substitute. I like to personally mix things up myself from time to time, but this specific filling is tried, tested and simply delicious, and I can personally say it’s one of my favourites as the flavours remind me of Italy.
-I use a kitchenaid stand mixer with a paddle attachment, but you can use a hand-held electric mixer, or even just a spatula (as you can tell, a lot of work goes into these cannoli, so anything to make it easier is what I’m all about)!
– In a stand mixer, with the paddle attachment, add the mascarpone to the large bowl, and mix it for a few seconds, to simply soften the cheese further.
– Once softened, add the ricotta and mix for anther few seconds, on medium speed, which should take only a few seconds. *A little note to be made is to use good ricotta and mascarpone cheese here, no two brands are alike, so be sure to use one that you like – the mascarpone should be thick like a cream cheese, and even though we lightly strain the ricotta, that too should be thick. I believe the moisture in both the cheeses that I used was about 57% for the mascarpone and 75% for the ricotta (I used the Emma brand mascarpone, and Santa Lucia brand ricotta).
– Once both cheeses are incorporated, add the icing sugar. You can add 1 cup at a time. What I usually do is add 1&1/2 cups, on a low speed mix, then taste for sweetness and add about 1/2 a cup more or so. It is better to add less sugar to start because you can add more, but you can’t take it away. I find 2 cups works best, but some may prefer it to be more or less sweet. Add the sugar to your taste. It is also a good time to scrape the sides of the bowl and give it another quick mix.
– Now you can add the extract, salt, cinnamon, and zest. Mix to incorporate. You can add all at once, or add one at a time, whip, etc… This mix is difficult to over mix, so don’t worry.
– Last, the mini chocolate chips, add to the mixture, and give it a final mix to incorporate. I like a few chocolate chips, but you can omit this step if you don’t, or add more if you prefer. I just find the 1/4 cup works best.
– Remove the filling and place it into a container, or bowl, covered with plastic wrap, and place it in the fridge until you are ready to use it.
– You can even make this filling a day or so in advance. I usually make the filling at this stage, because once the dough has been in the fridge for 1 hour, I take it out to roll and fry it, which gives the filling lot’s of time to chill out (literally).
Back to the dough…
– Let’s get ready to roll! I should mention you can of course roll the dough by hand, using a rolling pin. I don’t like to because the shells are never rolled uniformly enough for me, and it’s a lot more labour intensive then using a pasta machine. Yes, another easy hack, using a pasta machine to roll out this dough (much like how you would roll out pasta dough), is so much easier, and the cannoli are guaranteed to be the same thickness this way.
– Take the dough out of the fridge, lightly flour your surface, and cut it into quarters. You will then have 4 pieces of dough that need to be flattened enough (with our hands) in order to fit in the pasta machine.
– Begin by taking a flattened quarter of dough and passing it through the pasta machine. one at a time, until all 4 pieces have passed through the largest notch.
-Work your way through the machine, as you would pasta. Go notch by notch (I sometimes skip a notch – rebel, I know), until you have reached the 2nd last notch (or even very last notch if you prefer, I find that the 2nd last notch or last notch are my favourite thinness, as I like my shells to be thin and crisp). Flour the dough in between if you find it to stick.
– Your dough will be a nice long and thin strip of dough. Be sure to lay the dough onto the floured surface. You can even add a bit of flour on top of the strips, to assure nothing sticks.
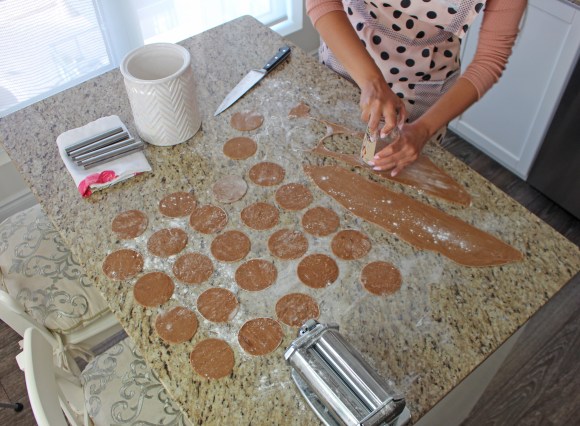
– Now that we have the thin dough, we simply need to cut it into circles. You can use a round cookie cutter, I simply used a glass to cut the circles out of the dough, trying not to waste dough (though I use the scraps and re-roll the dough once, to get a few more cannoli out of it). Try not to re-use the dough scraps more than once, or the texture will change when frying.
– With my handy glass, I cut out 3 inch rounds (these end up being more on the mini-side, which I prefer, but if you would like larger ones, just be sure the dough isn’t larger than the stainless steel cannoli mould. I wouldn’t necessarily go smaller, because you risk the dough being too short to be sealed (we will get to that soon).
– This dough makes about 24, if you roll out the scraps, up to 32 cannoli.
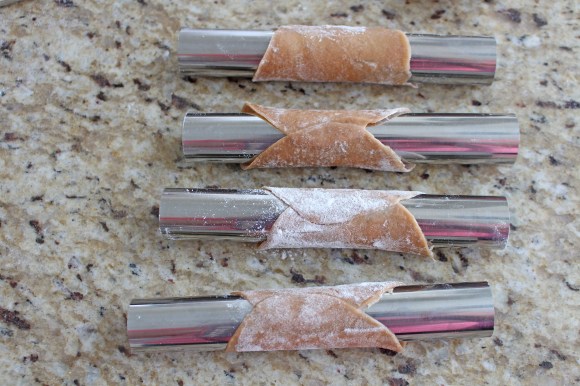
– We then need to shape these, by using the egg white that we saved earlier, brush the edge of the cannoli dough round, then roll the dough onto the steel cannoli cylinder form, and seal it shut using the help of the egg wash. As long as the dough overlaps enough to be sealed we are in business!
– Place enough oil to completely cover the cannoli in a medium or large pan. I used vegetable oil, but you can use any frying oil of your choice, as long as it’s flavourless.
– Like I said earlier, I make this sometimes rolling the dough out to the absolute thinnest notch on the pasta maker, but in this case (and in my video), I used the second thinnest notch which I find to be great. The shells are still thin and crisp, but not exasperatingly so.
– If you roll these to the thinnest notch, fry for 1 minute, if you roll to the second thinnest, fry for 2 minutes at 180 to 190(Max) degrees Celsius. If you find your oil to be too hot, you can even fry at 170). A digital thermometer is also a great tool here because we can carefully monitor our oil to be sure we aren’t over or under cooking these shells, but if you don’t have one, just be careful to not burn the shells. Start on a medium to low heat, and then by the end you will likely end up on the lowest heat. I fry these shells 1 to 2 at a time, but no more than that, in a large pan.
-I personally only had 4 stainless steel cannoli molds to work with, so I had my own mini work station going on. One was in the fryer, one was being rolled, one was cooling, etc..
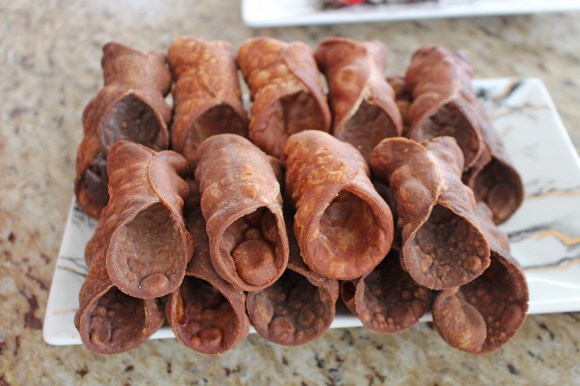
Once cool to the touch you can remove the shells from the cannoli mold, so that you can then roll another one to be fried. I like to lightly tap the end of the steel mold, and then slide the cannoli off. If it does not come off easily enough, it may be under cooked.
– Once you are done the tedious part, which is the frying, and the shells have cooled, then comes the fun part, which is piping and decorating!
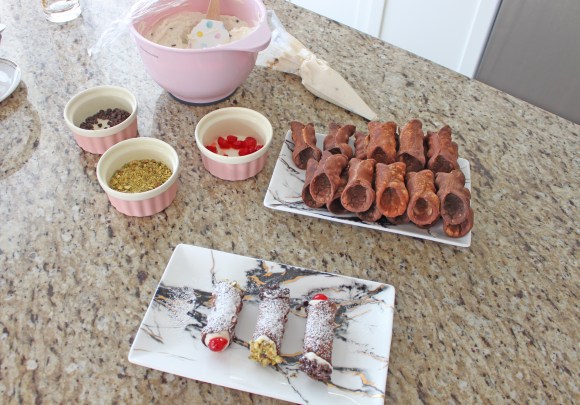
What you need to decorate (optional):
– Icing sugar – for dusting on the shells
– Chocolate chips, pistachio pieces, and cherries (you can also use candied fruit)
– To pipe the shell, carefully place the cannoli creamy filling into a piping bag, and cut off about 1 inch of the tip (you can even use a fancy nozzle to pipe, but with the way I will be decorating these, it is unnecessary.
– Once your filling is ready to be filled, grab a shell, slowly pipe the filling into 1 end of the shell, and then turn it, and pipe into the other end (try not to over or under fill these).
-Once you have piped as many as you will be eating, it is time to decorate. This is optional as you can eat these as is, but I like to dip these into pistachio crumbs, or chocolate chips, even placing 1/2 a cherry on one end.
– Once decorated to your liking, a step you really shouldn’t skip is the powdered sugar. I like to take some icing sugar, and lightly sift some on top of the piped and decorated cannoli to give it that final touch. I love the way this looks, as it’s very elegant and polished.
– You can then eat! These should be crispy and creamy little bites of joy! I love making these from scratch. It’s also important to note that these are best enjoyed freshly piped. That may not be possible if you are bringing these to an event, so just be sure to pipe them up as close as possible to the event, and keep them refrigerated until ready to eat.
– Fun fact: one Cannoli isn’t called a ‘Cannoli’ but rather a ‘Cannolo’, Cannoli refers to more than one, which is appropriate, because I can never eat just one Cannolo 😉

Here they are with the thinnest notch ^
If you have any questions feel free to ask me. Of course you can also see me make these cannoli HERE which is quite helpful if any of these steps sounded a bit confusing. It definitely helps to visualize a recipe. I know these are a lot of work, believe me, but this recipe was highly requested, and with my tips, and tools, I feel as though these are easy enough to make. Still of course laborious, but definitely worth the effort.
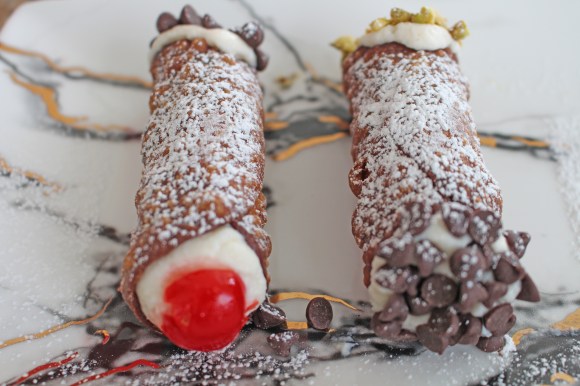 Here they are with the second thinnest notch ^
I hope you give this recipe a try, I know you will love it as much as I do! Don’t forget to check out how I made these in my YouTube video HERE! 🙂
– Lisa (@LaDolceLisa)
