
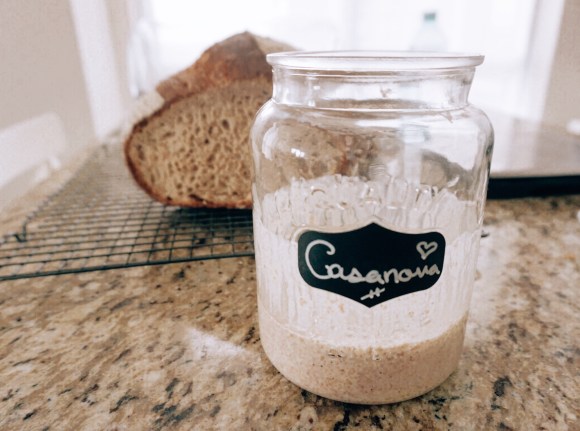
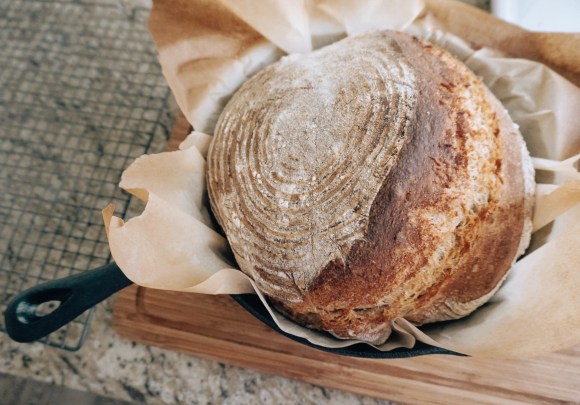
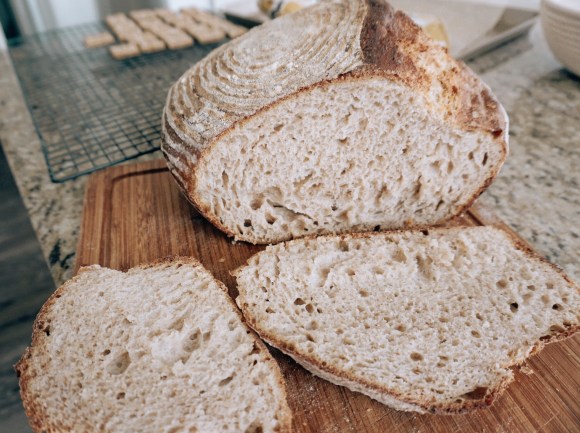
I think we can all universally agree that times have been strange lately. I don’t know how you have been passing the quarantine, but less time out and exploring the world meant more time at home for my sister and I. Due to this, we decided to finally tackle a goal of ours, and that was making sourdough bread from scratch at home. In order to do so, we needed to first make a sourdough starter, and so we both made our own, combining elements from various recipes online. The final result was a big hit for us, and we can happily say we have successfully made a very lovely, active, and nice smelling sourdough starter, which in turn produced beautiful results when it came time to baking our sourdough bread (and also discard crackers, which I really love making). Now is the perfect time to attempt a sourdough starter, as it needs daily feeding, and well, I don’t know about you, but I’m home every day now! It wasn’t without a few bumps along the way however. Since I also made a video, which was more vlog style than anything, you can also watch us making our sourdough starter HERE. There were moments that it wasn’t quite coming along the way we wanted, and so with a few tricks, we managed to get our starter actively rising and bubbly, and as I write this blog today, my starter Casanova (yes, I named him Casanova after the famous Italian lover so that hopefully my starter too would be ‘active’), is very active, and pleasant smelling, which wasn’t always the case in the beginning first few days of making the starter. You can use this sourdough starter to make sourdough bread, but also many other baked goods that you would normally use yeast in. You can also use the discard for recipes as well, so really the results are fruitful and endless. When I was a child my favourite bread was sourdough, and now knowing I can make this beautiful bread at home, using my very own starter, makes me feel quite accomplished.
Before we get into the recipe… What is a sourdough starter? If you are unfamiliar with bread making, in the case of sourdough, rather than using a store bought bakers yeast to make your bread rise, we are now essentially making our own living, wild yeast, made from flour, water and the yeast in the flour itself and from the air around us. The sour taste from the sourdough is due to the starter which uses the the lactic acid produced by the lactobacilli. In unscientific terms, this starter is essentially a fermented mix of flour and water that will not only naturally rise your breads and baked goods, but will also give them that classic ‘sour’ flavour. By discarding a certain amount of the starter and feeding it with flour and water each day, in a few days, to a few weeks time, you will end up with a living yeast that you use in recipes in place of store bought yeast. Yes, you have to feed your sourdough starter EVERYDAY, unless you refrigerate your starter (more on that later), but it takes only a few minutes to do so. For the purpose of this post, we are going to mainly focus on how to make a starter to begin with, and then talk about keeping it alive. The first step is getting started, and trust me when I say this, but it is not a difficult process at all, so there is no need to be intimidated. If you are diligent, you can keep this starter alive and well for many years. There is even someone on record who has kept a starter alive for 122 years, and counting.
This starter will take 1 week to make, and then if you are like me and hit a few bumps along the road, or wanted to wait a bit longer to achieve a more pleasant smelling starter, you may even wait 2 weeks before baking with your starter. My recipe is set up for 7 days time, changing slightly from day to day until the 7th day, where from then on nothing changes and you are left with a certain amount of starter to water and flour feeding ratio. So let’s talk about what we need to make a sourdough starter at home:
Sourdough Starter Ingredients and Tools:
Water: I use filtered/bottled water rather than tap, and I use room temperature water. If your home environment is a bit cold you can warm up your water slightly by microwaving it. Be sure it does not exceed 85 degrees F. 70 to 85 degrees F is ideal.
Flour: I use a combination of flours for this sourdough. In the beginning you will see in my video that we used only all-purpose flour for feedings, but that in my opinion is where we went wrong. The best thing to do, and what we now do every day is use a combination of flours, so that is what I will be sharing with you. The best idea is to use a flour you will be regularly baking with, which for us was all-purpose, but on top of that we also use whole wheat, which is necessary in this case to really keep your starter happy and healthy. Of course substitutions can be used in place of all-purpose (you can use bread flour for example, and so on). The important thing with the flour is that it is un-bleached. So be sure to shop for un-bleached all-purpose flour, and use organic if possible. Also, buy a LOT of flour as you will need 100g of it every day.
Flour and water are the only ingredients you need to make this starter, so now let’s talk about the tools you will need…
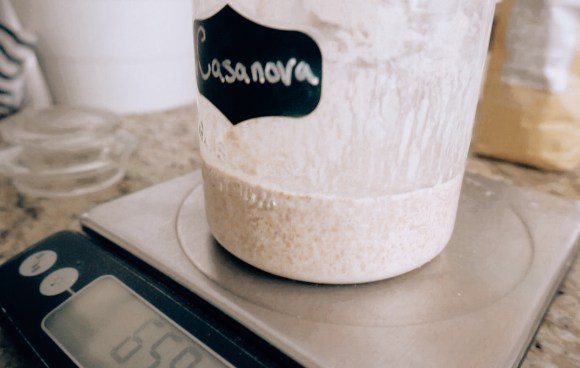
Kitchen Scale: This is one of the most important tools needed to make a sourdough starter. The reason for this isn’t just important for adding ingredients in, but also when it comes time for your daily discard. You may be able to make a sourdough starter without a scale, but in my case I use only gram measurements to really be accurate, as accuracy is key, and this scale will make your life SO much easier. I can link my scale on amazon below. If you are elsewhere in the world simply search on amazon for a digital kitchen scale, or your local kitchen supply store. I highly recommend a kitchen scale, they are inexpensive, and in this case necessary, so be here to pick one up before beginning your sourdough starter.
Amazon Canada (kitchen scale) Link:
Amazon USA (kitchen scale) Link:
Glass Jar (with lid): When I first started I used an old Maison jar with a glass lid (my sister used a cleaned pickle jar), but I found the mouth to be a little small and therefore a bit tedious when it came time to mixing. You need a large enough glass jar, and the one we finally ended up with was from the dollar-store, and we absolutely love it. I will try to link similar jars on amazon below. Just be sure to find a jar that has a wide mouth and is at least 4 to 5 inches wide and 6 to 7 inches in height, or 15 oz. I prefer a larger jar to give my starter room to rise. It will seem like you have a lot of room, but your starter will rise to double or triple in height. You will also need a lid, so if you have a perfect jar, but do not have the lid, you can use a cloth or plastic wrap on top, but that will get tedious, so I recommend getting a glass jar with glass lid (or any lid).
Amazon Canada (glass jar) Link:
Amazon USA (glass jar) Links:
Spatula: Most of us have this in our homes if we are bakers, but getting the right rubber spatula for the job can be a personal preference. I am happy to have 2 spatulas that I really enjoy using for the job of mixing. One of mine is a baby spatula to scrape the discard out, and scrape the sides down and keep my jar clean. Another is a larger, more stiff spatula that makes mixing the starter a lot easier. My sister actually prefers using a different spatula than I do, so again this is all preference. I will link a few down below, but of course, feel free to browse for one you may like yourself.
Amazon Canada (small spatula) Link:
Amazon USA (small spatula) Link:
Amazon Canada (large spatula) Link:
Amazon USA (large spatula) Link:
Let’s Begin!
Finally, with the ingredients and tools needed, we can begin. At first you will need to break up your starter feeding into days, and as I previously said, what you do on day 7 is what you will be doing for the rest of your feedings. All days, however, will require the same thing: flour, water, and mixing. You will also need to feed your starter at the same time every day. You can feed him a few hours earlier or later in the future, but for the first 7 days it is really important to be precise with your feeding schedule. If you feed him at 9am, you should feed him every day at 9am.
The best advice I can offer is to weigh your jar, as this will help with discarding. If you end up switching jars like we did half way through, you will need to measure your new jar and calculate accordingly. So weigh your empty jar, without the lid and keep that number in mind for your discard and feedings (I will talk more about this later).
*note: It is a good idea to begin this process by giving yourself a month to dedicate to your starter. If you are planning on going away for a weeks time or more, I would wait until you can dedicate at least 1 month to getting your starter happy and healthy which mean daily feedings. In the beginning it is good to build up a nice starter, and good fermentation, which means consistently (and constantly) feeding your starter. Even if after 1 week your starter is ready to go, and you can successfully bake with it, I would still recommend keeping it at room temperature and developing a nice fermentation. These feedings will take about 5 minutes of your day, so they are really easy to do, but you need to be consistent with timing. You will also go through a LOT of flour, so be prepared to buy flour in bulk in the beginning. In the end I have left tips for refrigeration (meaning you can refrigerate your starter for up to 1 week, therefore you do not have to feed him during this time, which is great if you are away on vacation).

Now we can REALLY begin making our sourdough starter…
Quick Feeding Chart:
Day 1: 100g whole wheat flour + 130g filtered/bottled water
Day 2: 70g starter + 115g water + 100g flour (50g whole wheat + 50g all-purpose)
Day 3: 70g starter + 110g water + 100g flour (50g whole wheat + 50g all-purpose)
Day 4: 70g starter + 105g water + 100g flour (50g whole wheat + 50g all-purpose)
Day 5: 50g starter + 100g water + 100g flour (50g whole wheat + 50g all-purpose)
Day 6: 50g starter + 100g water + 100g flour (50g whole wheat + 50g all-purpose)
Day 7: 25g starter + 100g water + 100 g flour (50g whole wheat + 50g all-purpose)
*Every day (from day 2 on) discard, add water + flour, mix, put lid on, and set aside for 24 hours at room temperature. For the detailed feeding chart, see below:
Feeding Chart Instructions:
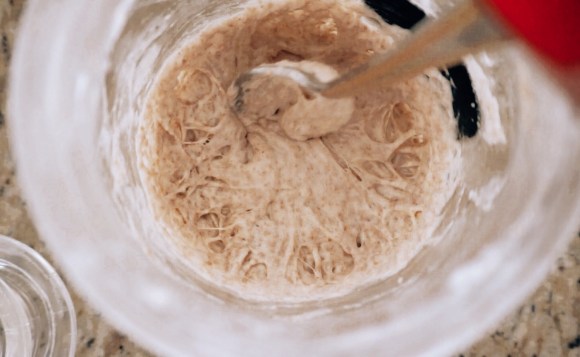
Day 1: Today we begin making our starter. Start with a clean and dry glass jar, and measure it. It is important to know how much your jar weighs (without the lid) because when it comes time to discarding our starter (on day 2), this will help with the feeding. Weigh your empty jar, then add to it 100g of whole wheat flour, and 130g of the room temperature, filtered or bottled water. Today is the only day that we use only whole wheat flour. When it comes to measuring, like I said, I use a scale, place my jar on, set the scale to 0, then weigh the flour, once the flour is 100g, set to 0 then weigh the water, once I have the 130g for today, we can begin mixing. Using a rubber spatula simply mix until combined. This mix will be similar to a thick porridge or peanut butter in consistency. You want to mix until you don’t see lumps of flour. This can take anywhere from 1 to 3 minutes. Be sure to scrape down the sides of your jar so that you can see how active your starter is. Then you want to place the loose fitting lid on, and place this in a warm(ish) spot in your kitchen. I place this jar in my cupboard near the stove. You can watch my video HERE for a better visual.
Day 2: After 24 hours, if you notice your starter is looking good, and he has some bubbles and activity going on, he is ready for day 2. If there are no signs of life whatsoever, you may need to push day 2 off until tomorrow. If you are ready for the first feed we can now start, and starting means discarding. This is why weighing your jar will come in handy; we now need to discard! Discarding means you will throw out all but the certain grams of flour you need each day. Today we will discard all but 70g of the starter. This is why you will now see measurements saying 70g starter + the water + flour. For example, if your empty jar weighs 400g, after you discard your starter, your jar will now weigh 470g. This is the easiest weigh to have the correct amount of starter in your jar. This is also why I recommend a kitchen scale. I like to give my starter a mix before discarding, so I always mix with my small spatula and then discard. Now with the 70g of starter left in your jar, you will then add the 115g water (less than yesterday), and then the 100g of flour. (When I started, I only used all-purpose flour, but through trial and tribulation I learned that a 50/50 mix of all-purpose + whole wheat is best, and really helped to give my starter the rise I was looking for, plus a more pleasant smell, and even more bubbles, so I recommend doing this right away to save you time. In my video you won’t see me do this until the second week, but this is why I do this first, so that I can make mistakes, and you don’t have to). Mix everything together until there are virtually no lumps, and it is a smooth paste. Try to scrape down the sides so that your jar stays clean, and be sure to have the mouth of the jar clean as well. Place the lid on, and again store your jar at room temperature.
Day 3: Today is the same as day 2, except as you saw from the feeding chart, the difference is 5g less water. So do the exact same thing, except today is 110g water. Your starter may smell a bit unpleasant. Mine smelled like sour cream, and although I hated the smell, it did not smell rancid at all. With your starter + water + flour, mix as usual, place the lid on, and put away at room temperature.
Day 4: Today again is the same, but 5g less water, yet again leaving you with 105 g water. Continue to do the same steps as previously mentioned by discarding, and feeding.
Day 5: Today there is less starter. This means if your jar would weigh, for example, 400g empty, now we are discarding all but 50g, so your jar will weigh (after discarding) 450g with the correct amount of starter left inside. Now we begin a new water ratio, and one that we will always continue with – 100g. Today is again, as usual 100g of flour (so 50g whole wheat, 50g all purpose). Mix as usual, place the lid on, and keep at room temperature.
Day 6: Today is the exact same as day 5, so again 50g starter + 100g water + 100g flour (50g whole wheat, 50g all purpose), mix, and set aside at room temperature.
Day 7: Today is what you will be doing from now until the next 122 years! You will mix and then discard all the starter in the jar, except for 25g. If your jar weighs 400g empty, it will now weigh 425g with the correct amount of starter left inside after discarding all but 25g. Add 100g water + 100g flour (50g whole wheat, 50g all-purpose). Mix everything together until there are no more flour lumps, trying to keep the sides scraped down and clean, and then place the lid on and set aside at room temperature.

Troubleshooting & Advice:
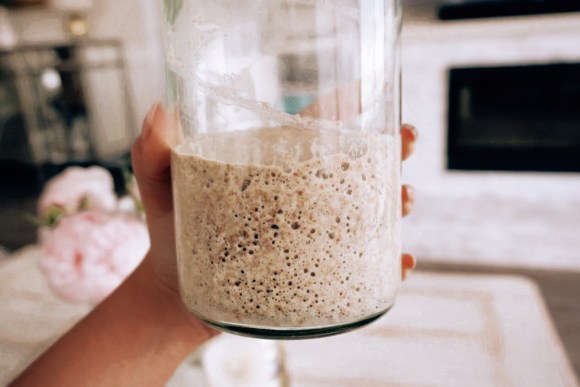
You should notice your starter is most active about 10 to 12 hours after the feeding. For example, if you feed your starter at 9am every day, by 7 to 9pm your starter should be double or triple in volume/rise. It will also smell best at this time, as opposed to right before a feeding where the smell will be stronger. You will notice the rise at the next feeding if you miss looking at it when it is most active because you will have seen an imprint of left over of starter that has climbed up the sides of your jar. This is why it is important to keep your jar clean, so that you can notice this activity. If your starter is not active, it will not yet be ready to use for bread baking. Also, if your starter still smells really unpleasant, and if it hasn’t been active enough, as in not enough bubbles or rise, you will need to continue doing what you are doing, and it is likely that your starter needs more time to mature and ferment. My starter didn’t smell pleasant enough until about 10 days in (but that was likely because I did not feed him a mix of whole wheat and all purpose flour). Hopefully you can learn from my mistakes and your starter will come together a lot quicker than mine, but patience is a virtue! Your starter should never have signs of mould, whether that is visual or even an awful overly pungent smell, if that is the case, yours may be spoiled and you will need to start again. If you notice you have been doing all the right things, there are no bad signs, but still it is not coming together, what helped me was to give him about 5 to 10g less water, and 5 to 10 g more flour. This is not what you will always do, but sometimes a bit less water can help get your starter going. You may also need to clean your jar out, because if you have too much crusty flour on the sides, it might mess up your measurements. To clean your jar, I do this during a feed. So, I weigh in a separate bowl the 25 g starter, then I discard the rest as usual, and clean my jar. It is a good idea to NOT use soap as the starter really does not like this. So with warm water, clean your jar, set aside to dry, and you can add the flour and water to the starter in the separate bowl and then transfer it all back into your clean jar, careful to not get any on the sides, and then place the lid on and store as usual. I have also read about hooch, and I did in the beginning notice a tiny little bit of it which is harmless. Hooch will look like a darkish liquid which is really a naturally-occurring alcohol. This means your starter is hungry. Hooch is harmless but should be poured off and discarded prior to stirring and feeding your starter. If you see a bit, simply stir your starter, discard, and feed as usual. This may mean your starter is really hungry and you need to feed him sooner than 24 hours, which could also indicate he is too warm. A few things can go wrong, or take quite some time and troubleshooting as you can see, but all in all it is quite easy, and with patience, the correct measurements, and a diligent feeding schedule, your starter should be ready in no time!
Skipping A Day of Feeding:
If you are away for a day or so and need to skip a feeding but do not want to refrigerate your starter, you can simply reduce the starter and water, and therefore slow down the fermentation of your starter, meaning he will be less hungry and you can afford to skip a day. I would not do this often, but occasionally it is fine. Rather than the day 7 feed (25g starter + 100g water + 100g flour), we would do: 15g starter + 75g water + 100g flour. To also slow down activity, you could use water that is a bit cooler, and you can store it in a cooler than usual spot (like near the air conditioner). This works best for being gone for 24 to 36 hours. I wouldn’t recommend this for over 2 days, so if you are planning on being away for longer, see below:
Refrigerating Your Starter:
If you are planning on being away for 1 to 2 weeks you will need to refrigerate your starter. I do not recommend doing this until you have kept him alive and well for at least 1 month. After you are familiar with him, and you have no trouble with feedings, you can refrigerate. I recommending doing this only when necessary, but it is quite easy. If you are going away for longer than 1 month you can give your starter to a friend or family member to take care of (it is a living thing, like a pet!), or you can dry it out (however, I have not yet tried this, so I won’t attempt to go there just yet). For refrigeration you will need your jar to be clean, so set aside 25g of the mature starter, clean your jar, and then add to that 100g of the flour mix, and only 80g of water. Mix as usual, place in the clean jar with the lid on and let your starter sit at room temperature for about 1 hour to start the fermentation. Then, place your jar in the fridge (hopefully not in a spot that gets too cold (the top right side of my fridge tends to freeze things), so hopefully your jar is in a nice spot. While your starter is in the fridge or while you are away, you do not have to feed him for a week or two. Then once ready for feedings you will need to revive your cold starter. I like to revive him a few days before I am planning on using him for baking. Simply take your starter out of the fridge and let it get warm, which can take about 2 hours or so. Stir your mix and then discard and feed as normal (the day 7 feed). I haven’t refrigerated for longer than 2 weeks, so I cannot recommend any longer than that for certain.
You can watch me make my starter from the beginning HERE. You can see mistakes I’ve made along the way, but you can also see the end success. As of today I am constantly making discard crackers with the discard (meaning instead of throwing away the sourdough starter discard, I use it in recipes). I have also made sourdough bread many times with great success, and each time I bake bread, the better it turns out. I did not want to share my starter recipe with you all until I successfully used it, so this is why it has taken me quite some time to get out the recipe. If you would like to see me bake bread, or if you would like any recipes I have used and enjoyed along the way, please ask and I will be happy to share! Before we go over the baking process, I wanted to share my tips for achieving an active sourdough starter, so I hope you enjoyed this post & video!
I hope this sourdough starter guide is helpful and gives you the results you are looking for. If you have any questions or comments, leave them here, on my youtube video, or ask me on Instagram and I will be happy to help 🙂 Thanks for reading this long guide, and hopefully you have also seen my vlog style video journey on the trials of making sourdough starter at home.
Love: Lisa (@ladolcelisa)

2 replies on “Sourdough Starter Guide & Video”
Hi Lisa, Is there a recipe for the actual sourdough bread? Thank youCarmela
https://youtu.be/DsGDG7C2_dY I am happy to share my sister’s recipe with you! Her and I both use this, and it’s so easy 🙏❤️