
This dessert reminds me of something my mother would make us when we were young. Her meringue style dessert had the addition of ground almonds I believe. It was one of my favourite desserts she ever made, the crunch of that meringue paired with the creamy cold whipped cream, and burst of sweet berries; it was heaven. I started making this recipe as an homage to what my mom would make us, and this has quickly become everyone’s favourite dessert. My sister even requested it for her Birthday cake, so I decided to film the recipe and finally share it with all of you. This is a very classic pavlova using simple ingredients that you likely have at home. It consists mainly of egg whites and sugar, which is great during this strange time we are living in where flour is hard to come by for some at the grocery store. A pavlova is almost always topped with whipped cream and fruit, so I will also tell you how I whip up these components as well. This would be the perfect Birthday cake if you are in need of a show stopping, yet humble and rustic dessert for a Birthday. Do not be intimidated, this is actually quite easy to make, and you can even watch me make this heavenly dessert HERE on YouTube.
Pavlova Ingredients:
6 Large Egg Whites (3/4 Cup) – Room Temperature
1 + 1/2 Cup Sugar (Granulated, White Sugar)
1 Tbsp Corn Starch
1 + 1/2 Tsp (or 1/2 Tbsp) Vanilla Extract
1 Tsp Lemon Juice or White Vinegar
Pavlova Instructions:
-Set your oven to 275F (once we put the pavlova in, we will immediately lower it to 250F).
-Have a baking sheet ready with parchment paper, I hold down the parchment paper with 2 heavy knives, so that spooning the mix on is easy, and doesn’t cause the mixture to move. Remove the knives before placing in the oven.
-In the large metal bowl of your stand mixer, or any other non-plastic bowl (if you are using a hand-held electric mixer, I find metal or glass bowls work best) add the room temperature egg whites. I let these sit out for 2 hours or so in order to come to room temperature.
-Whip the egg whites on a medium speed (about 4) until frothy.
-About 5 minutes later we can then add the sugar. I add about 1/2 a cup at a time, very slowly pouring the sugar in, as the mixer is going.
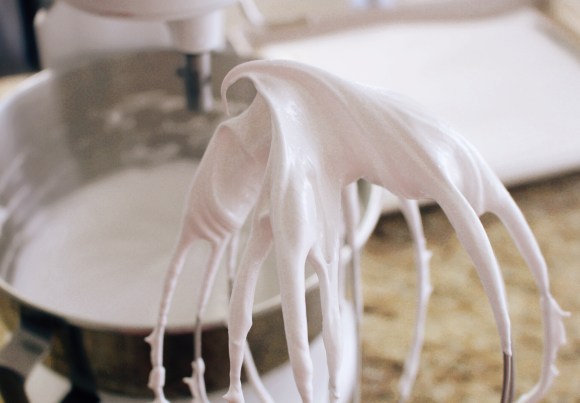
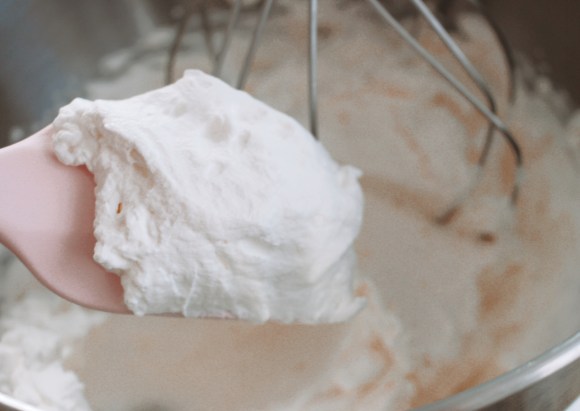
-Once all the sugar is in, this usually takes about 2 to 3 minutes, I then scrape down the sides of the bowl, and increase the speed to a medium/high speed (about 6/7), and whip this for another 5 minutes or longer until the sugar dissolves, and the egg whites are stiff peaks. You need the egg whites to be quite stiff, so if you are using a hand-held mixer, this could take double that time. If you are unclear what the whites should look like, you can watch me make this meringue for the pavlova HERE on my YouTube channel.
-One you have achieved stiff peaks, add the corn starch, vanilla extract, and finally lemon or vinegar, and mix to incorporate. You may need to scrape down the sides of the bowl again and give this one final quick mix. Be sure not to over mix at this stage now.
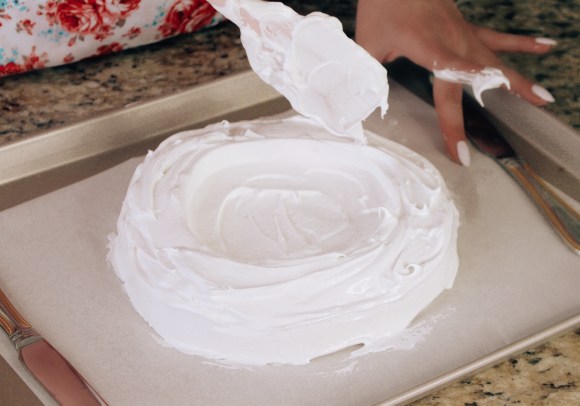
-Now we can add this fluffy meringue to the parchment lined baking sheet. I used 2 knives to hold down the parchment, as it can move around during this spooning stage, just be sure to take them away before placing this into the oven.
-Carefully spoon this mixture on, keeping it as a round dome-like shape. We are aiming for 8 to 9 inches of a circle here, so imagine the size of a cake pan. If you would like, you can even trace a circle on the back side of a parchment paper to help you.
-Once you have the 8 or 9 inch round meringue, you will need to create a dip, or well in the centre of the meringue. This means the walls will be slightly higher than the middle, so imagine about 1/2 inch or so dipped into the centre of the meringue. It will almost look like a birds nest, so a nice shallow centre is a must, it helps cook this and assure crunchy meringue with a bit of marshmallow-like texture inside. So good!
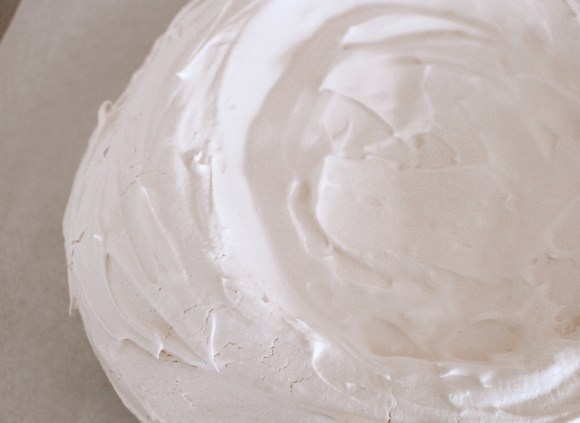
-You can play around with the sides and swoop swirls into the sides or even centre, but I enjoy this meringue to look a bit rustic, and the whole thing will be covered in berries and cream anyhow.
-Place this into the oven set to 275F, and then immediately lower it to 250F and bake for 1 hour and 30 minutes, without peeking. It is best to not bang around the kitchen too much, but this day we were preparing a big birthday feast, so of course we did quite a bit of banging around. This can cause a few cracks, but again, do not worry as they will mostly be covered!
-Once the hour and 30 minutes are up, I turn off my oven, and I open my oven door a crack for a minute or 2 to let some steam out, then I close the door and leave it in the oven for an additional hour or 2. You can even do this over night and leave the pavlova in the oven (turned off), the entire time.
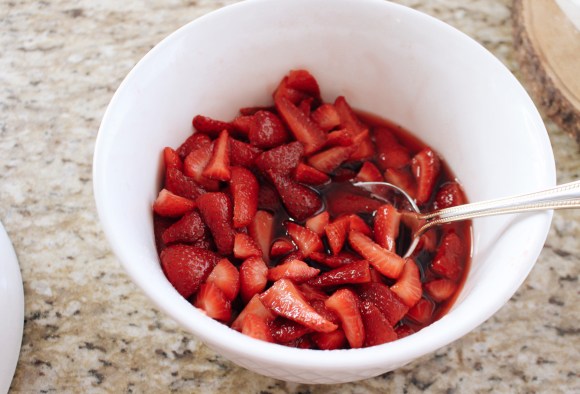
During this wait time we will prepare the strawberries. You can of course use fresh sliced strawberries on top, or any fruit of your choosing, but I love the way this comes out. It is so delicious. I essentially macerate these strawberries in sugar and a bit of liquor.
Macerated Strawberry Ingredients:
2 Packages of fresh Strawberries (680g or 24oz worth)
1/3 Cup Sugar (I used light brown sugar, packed)
1 Tbsp Vanilla Liquor *You can substitute for Vanilla Extract
1 Tbsp Cognac *You can omit this, if you do not like alcohol, or sub for another liquor
Macerated Strawberry Instructions:
-Wash and slice these fresh strawberries. I like to 1/4 them, so I slice the top off and cut them into 4 pieces, but you can even cut them into 6 pieces if your berries are quite large, or 1/2 them if your berries are quite small.
-Add the 1/3 cup of sugar, give it a mix, and then add the liquor. I loved this combination of the vanilla liquor with the fragrant cognac, but you can substitute for extracts if you prefer not using alcohol, or you can substitute the alcohol, it is your choice.
-One the sugar, liquor and strawberries are nicely mixed, you can taste this for sweetness and flavour, I then cover this and place it in the fridge for a few hours (minimum of 2 hours). During this time, the sugar, strawberries, and alcohol will form a syrupy juice, and the berries will soften (but not overly so).
Now that the pavlova is finished, the strawberries are made, we are ready for the final step, the whipped cream. I like to make this at the last minute, right before spooning this on, but if you are pinched for time, you can whip this a few hours ahead of time, and simply top this pavlova before serving.
Whipped Cream Ingredients:
2 Cups or 475ML Whipping Cream (35%) *Cold
1/4 Cup White Sugar
Splash of Vanilla Extract, optional*
Whipped Cream Instructions:
-Add the cold cream, sugar, and if using, extract to a large bowl, or the bowl of your stand mixer. Whip on medium/high speed until soft peaks form.
-Use this immediately to top the pavlova, or else keep this in the fridge for a few hours. I recommend making this as close as possible to when you will be eating this pavlova. As you can see, I like to top this pavlova as well as spread some around the sides. It looks impressive, and tastes even better. Whipped cream and meringue is the best combination!
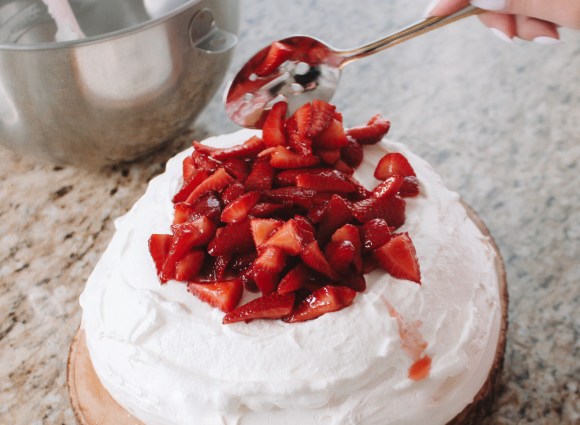
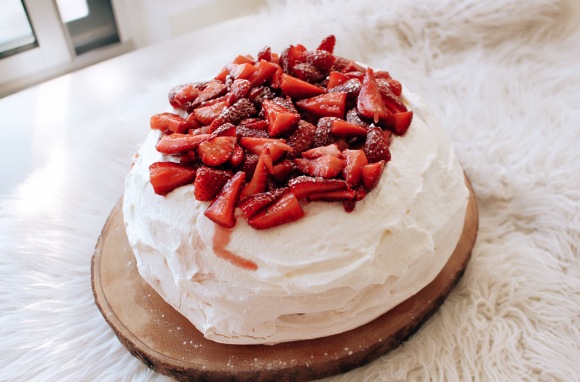
Pavlova Assembly:
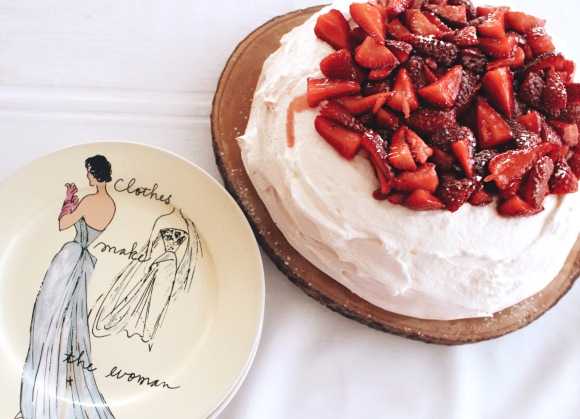
Place the light and airy meringue onto a serving board, serving plate, or cake stand. Carefully spoon on top all of the whipped cream. Add the strawberries without the juice at first to the top of the whipped cream. Soon on top a bit of the juice, then sprinkle with icing sugar if you would like.
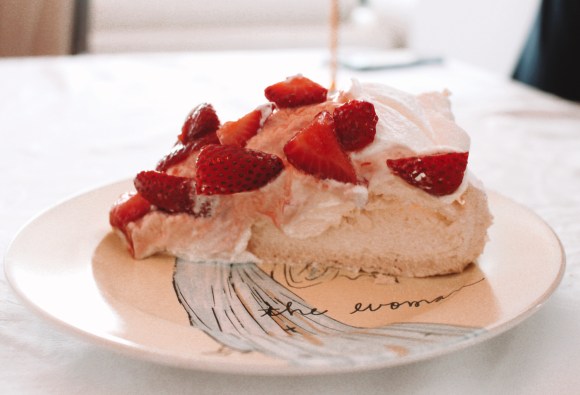
One I cut and plate the pavlova, I pour a bit more of the strawberry syrupy juice onto each plate, but this is optional.
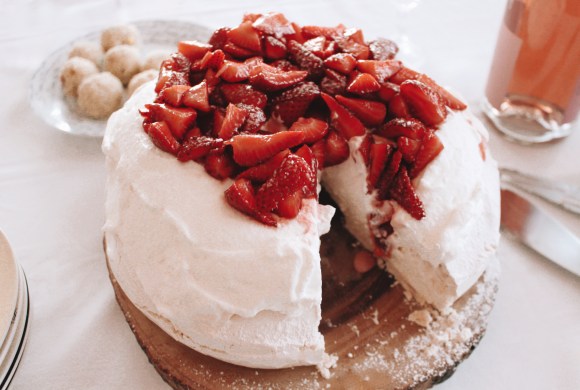
TA-DA! The pavlova is complete. It seems like a lot of steps, but it really comes together in minutes. The longest time is the waiting time in between.
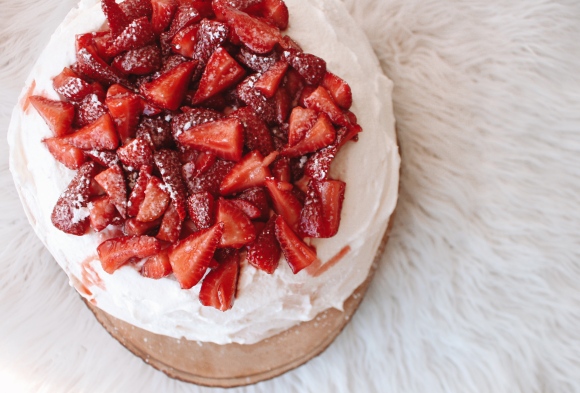
Do not worry if your pavlova cracks, that just adds to the rustic beauty of this elegant dessert. I was banging around in my kitchen a LOT this day, because I was also preparing dinner, and it cracked a bit more than usual because of this, but if you are more still, this should hardly crack. Though topped with whipped cream and fruits, no one really sees the small cracks either way! This pavlova will melt in your mouth! The crisp and crunchy meringue, with the cool, slightly sweetened whipped cream, and those syrupy strawberries is truly an unbeatable combination. I hope you enjoyed this recipe, and I really hope you give this a try. I know it will become your favourite dessert!
Love: Lisa (@ladolcelisa)
